Probably the best thing to happen during quarantine was my obsession with BTS. It started around May… I watched some videos and wanted to know their names. Fast forward, they are now my favorite band and quite honestly, some of my fav people even though I have not met them in real life. They are just so hilarious and bring so much positivity to my life during a difficult time. I love that they have endless content coming out all the time so that my life is just eternally BTS (anyone else watching In the Soop?). A BTS life is a wonderful life!
You might have guessed based on this pattern that JHope is my bias. I love his bright, colorful personality and I hope someday I can go to a BTS concert and shout HOOOOPE when he points his mic at the audience.
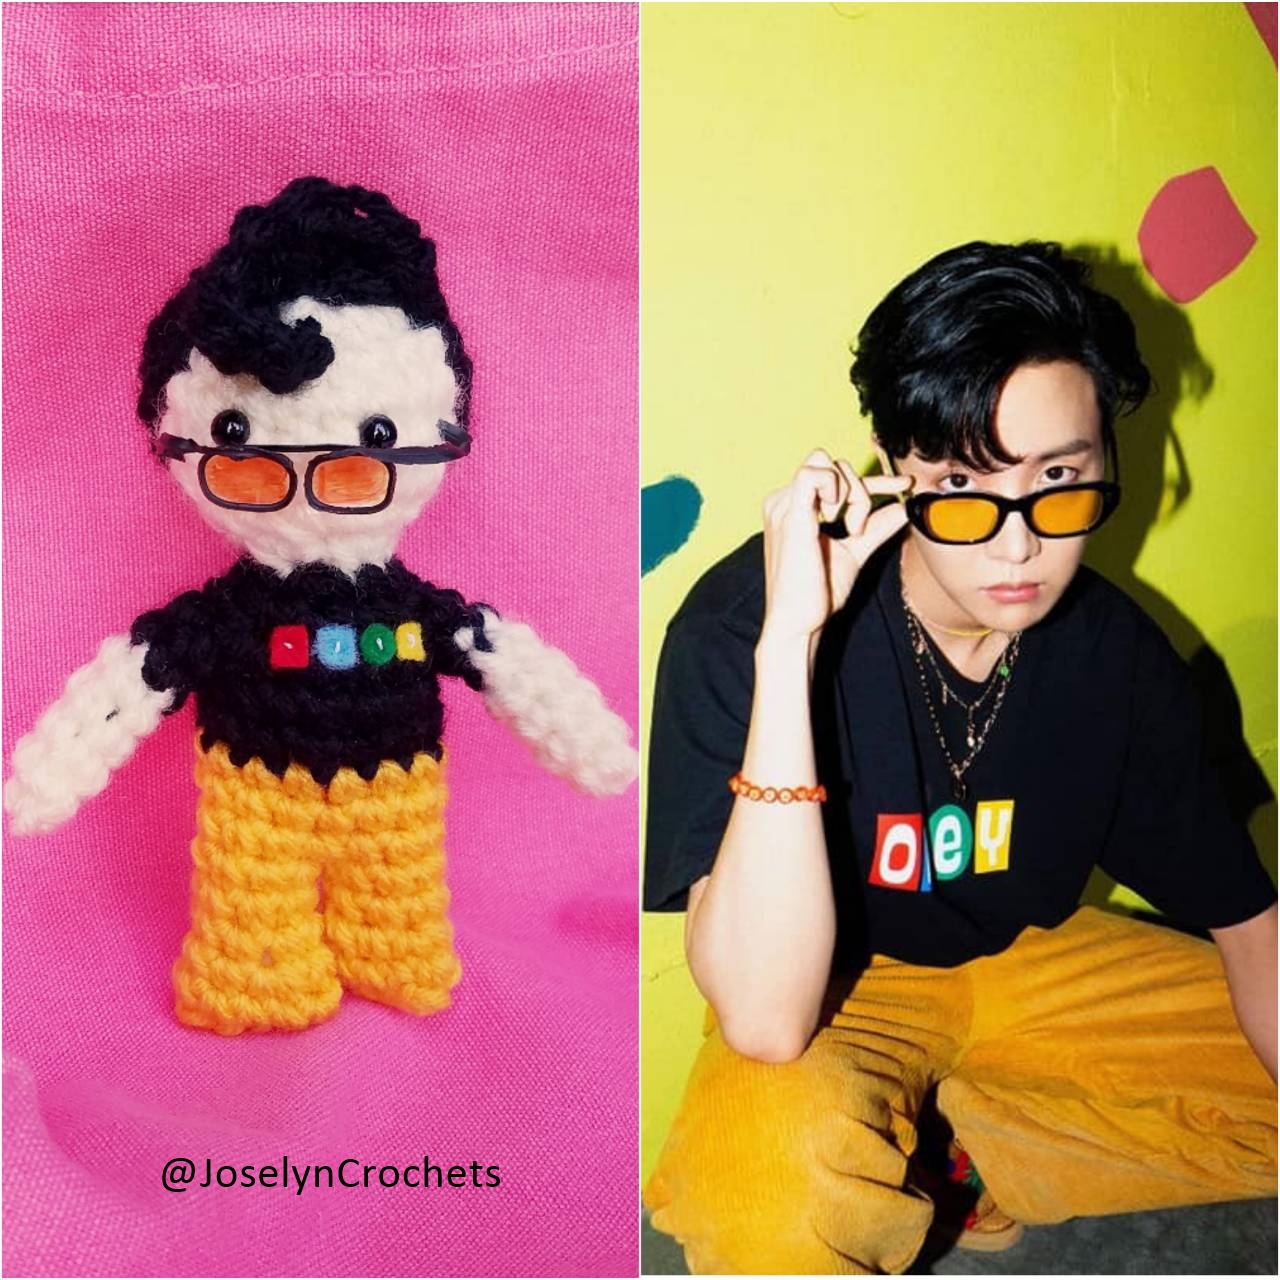
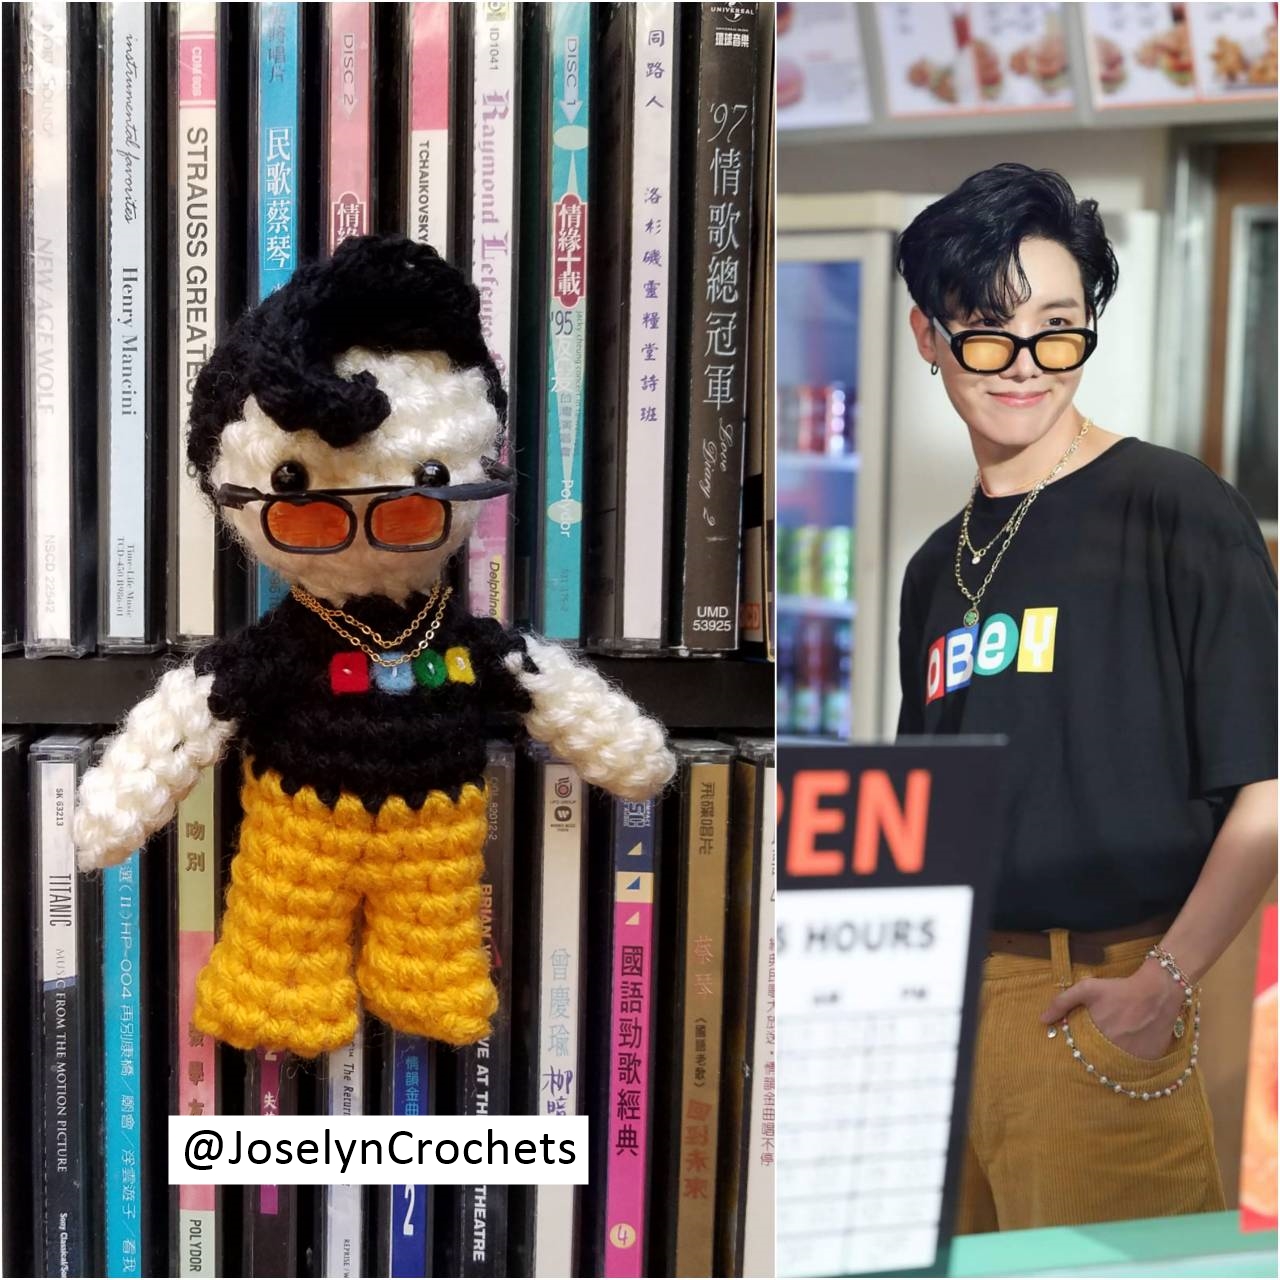
I’m really proud of what BTS has achieved with Dynamite. It is one heck of a song and each performance is unique. And their outfits in the music video are iconic.. especially JHope’s gold pants! And those sunglasses!
This is probably my fav doll that I’ve made. Fun fact: the pattern for the hair coif is the same as the hair on a Conan O’Brien doll I made a while ago.
Hope you enjoy making your doll with this pattern, and that it brings you some sunshine too 🙂 Can’t wait for their new album in November!!
Materials:
- Skin-colored yarn (weight 4)
- Black yarn (weight 4)
- Gold yarn (weight 4)
- Safety eyes (6 mm)
- Hook (3.75 mm)
- Yarn needle to weave ends and sew pieces together
- Stitch marker to mark your place
- Stuffing
Optional decorative materials:
- “Obey” graphics on the shirt:
- Red, blue, green, and yellow felt squares
- White thread + sewing needle to sew on the squares
- Sunglasses:
- Black twist-tie
- Clear tape (or saran wrap)
- Yellow or orange Sharpie
Abbreviations (US conventions):
- Sc (single crochet)
- Inc (Increase): put 2 sc into 1 stitch
- Dec (Decrease): sc 2 stitches together
- Ch (chain)
- Sl st (slip stitch)
- Hdc (half double crochet)
- Dc (double crochet)
Notes:
- This pattern is worked in continuous rounds of single crochet (sc), working from the top of the head to bottom of the body.
- Arms and hair are made separately from the main body and attached afterwards.
- When changing color, I like to do the color-change on the backside of the body (opposite side of where you attach the eyes) so that it is not visible from the front. This may not work out perfectly because the beginning of a round may occur at the front of the doll. In this case, I like to start a round with the old color and switch to the new color once I reach the backside of the doll. This can be confusing to keep track of, so if you do this, I highly recommend using a stitch marker to mark the beginning of a round so you don’t accidentally make more stitches than you need to. However, if you don’t mind the color-change occurring on the front side of the doll, then this does not matter and you can disregard this bullet point.
HEAD/BODY/LEGS
R1: Start with skin-colored yarn. 5 sc in magic circle (5 stitches)
R2: Inc all around (10)
R3: * 1 sc, inc *, Repeat all around (15)
R4: * 1 sc, 1 sc, inc *, Repeat all around (20)
R5-6: 1 sc all around (20)
R7: * 1 sc, 1 sc, dec *, Repeat all around (15)
R8: * 1 sc, dec *, Repeat all around (10)
Attach safety eyes between rows 5 and 6. I typically position the eyes with 3 stitches between them (2 “holes”).
Stuff the head with filling.
R9: Dec all around (5)
R10: Switch to black yarn. Inc all around (10)
R11: * 1 sc, inc *, Repeat all around (15)
R12-14: 1 sc all around (15)
R15-17: Switch to gold yarn. 1 sc all around (15).
Stuff with filling.
R18: Sc along until you reach the midpoint of the front side of the doll. This location is where the legs begin to separate (the crotch of the doll, if you will). Sl st at the 8th stitch away — this position is the midpoint of the back side of the doll and will result in each leg having 7 stitches.
We will now work on 1 leg at a time.
Leg R1: 1 sc all around (7) — be careful not to sc into the slip stitch of R18.
Leg R2-3: 1 sc all around (7)
Leg R4: * Inc, 1 sc * Repeat all around and stop once you have made 10 stitches in this round. (10)
Leg R5: 1 sc all around (10). Stuff with filling (minimal is fine).
To make the other leg, insert your hook (with new yarn) into any stitch in the last row of the other leg. Then, repeat Leg R1-5.
Sew up both legs when complete — I flattened the legs and whip stitched across the opening to result in a wide bell-bottom pants look.
ARMS
R1: Using skin-colored yarn, 5 sc in magic circle (5)
R2-5: 1 sc all around (5)
R6-7: Switch to black. 1 sc all around (5)
Repeat for the second arm. Sew onto body. (I don’t put filling in the arms — they feel sturdy enough for me!)
HAIR
R1: Using black yarn, 5 sc in magic circle (5)
R2: Inc all around (10)
R3: * 1 sc, inc *, Repeat all around (15)
R4: * 1 sc, 1 sc, inc *, Repeat all around (20)
R5: 1 sc all around (20)
R6: Hdc in the 1st stitch. Dc in the next 15 stitches. In the last 4 stitches: Hdc, Hdc, Hdc, Sc. (20)
R7: Flip the work. In the “top” (“back”) loops of the next 3 stitches: Hdc, Dc, Dc. Attach your stitch marker on the NEXT stitch (the 4th stitch of this row) to keep track of that position. From your hook’s current position (the 3rd stitch), Ch 8. Do the following into the 7 stitches of this chain: Sc, Sc 3 together, Sc 3 together. Then, slip stitch into where you placed your stitch marker. This chain section that you just completed is the coif of the hair — you can style it by curling it with your finger. It should look a little like an elephant trunk.
Sew the hair to the doll head with the coif on the front side of the head.
OPTIONAL DECORATION: “OBEY” GRAPHICS ON THE SHIRT
Cut little squares from your colored felt pieces and use a sewing needle and white thread to sew each square onto the front of the shirt.
OPTIONAL DECORATION: SUNGLASSES
Shape a black twist-tie into a sunglasses structure. I unfortunately have not yet found an elegant step-by-step direction for the shaping — just lots of trial and error!
Put clear tape (or saran wrap) onto the lens area. Cut off any excess. Using yellow or orange sharpie, color the lens.
I placed the sunglasses on the doll’s face without securing them, because my doll will be displayed and not handled. You might consider securing the sunglasses onto the face with hot glue (or other less visible method) if you plan to move/handle your doll.
********************************************************
Hope you enjoy making your doll! 🙂 I would love to see your result — please post on Instagram and tag @JoselynCrochets. Please remember to credit me when sharing this pattern.
Please let me know if you have questions or find errors in the pattern. All feedback is welcome and appreciated!